jQuery
Simple jQuery Show/Hide Tabs
Updated June 20, 2010: There’s an improved version of this code posted here. Use it instead!
I am learning jQuery and really loving it! Here’s a simple bit of code I wrote to achieve an interface element. It’s basically tabs — there’s a list of links and when you click one the corresponding content is shown. It assumes there’s an equal number of links and content blocks. And that they’re in the same order. The HTML is like so:
The # links / id’s on the content div’s are to give some functionality for people without JavaScript. Here’s the jQuery:
Simple! Best wishes to you in your coding!
Simple jQuery Fade-in/Fade-out slideshow
Hi there. I’m learning jQuery and finding it super easy and fun to work with!
Here’s a simple fade-in/out slideshow I wrote for a friend’s website. I knew there were already plug-ins out there for achieving this sort of thing, but I decided to write my own in order to become more familiar with some of the basic concepts.
See it in action. Here’s the HTML we’re outputting:
And here’s the jQuery:
As you can see, it’s pretty basic. There’s a number of improvements that could be made, such as having the jQuery insert the control links as they’re somewhat redundant for the non-JS user. Also, it’s a bit fussy about divs — you might want to have some inside your slides but, as written, that would confuse it. I’ll post again if I get around to addressing that.
As always, best wishes to you in your coding!
ModX Snippet for a simple jQuery Flickr fade-in/out slideshow
Hello! I posted previously about a simple jQuery slideshow I created for accessing sets on Flickr. To use it at work, where we’re running ModX CMS, I turned it into an easily-reusable “snippet.” You can see it in action here.
Here’s what you do:
- Call jQuery in the head of your template. As of this writing I’m using 1.3;
- Upload the Flickr API library to your server and call it something like “flickr_api.inc.php”. It is a very slightly modified version of Rasmus Lerdorf’s PHP5 Flickr_API;
- Upload the jQuery slideshow to your server and call it something like “flickrslideshow.js”. An explination of the jQuery can be found in a previous post;
- Create a new snippet called “flickr-slideshow”. The contents of that snippet is bellow;
- And finally, call the snippet like so: [[flickr-slideshow? &photoset=`XXXXXXXXXXXXXXXXX`]], replacing, of course, the XXXs with the ID of the Flickr set.
The contents of the “flickr-slideshow” snippet:
<?php // Get the photoset from the snippet call $photoset = isset($photoset) ? $photoset : ''; // Your path to to the Flickr API library include_once("pathto/flickr_api.inc.php"); // Your API key $secrets = array('api_key'=>'XXXXXXXXXXXXXXXXXXXXXXXXXXXXXXXX','api_secret'=>'XXXXXXXXXXXXXXXX'); // Create an instance of the Flickr class, using your credentials $flickr = new Flickr($secrets); // Load the set we're looking for into an array $photos = $flickr->photosetsGetPhotos($photoset); // Start a counter $counter = 1; // Get the total number of photos in the set $photocount = count($photos['photos']); // A wrapper div, used by the jQuery echo '<div class="flickrslideshow">'; // Now to loop through the photos in the set... foreach($photos['photos'] as $photo) { // Get the path to the image $url = $flickr->getPhotoURL($photo,''); // Get the image info $info = $flickr->photosGetInfo($photo['id']); // Another div for the jQuery echo '<div>'; // Output the image tag, with the title as the alt echo '<span class="image"><img src="'.$url.'" alt="'.$info['title'].'" /></span>'; echo '<p class="caption">'; // If the photo has a title, output that... if ($info['title'] != ""){ echo '<strong>'.$info['title'].'.</strong> '; } // and ditto for the descrition. if ($info['description'] != ""){ echo ' '.$info['description'].' '; } echo '</p>'; // Output the count echo '<p class="controls">Image '.$counter.' of '.$photocount.' | '; // Set up some numbers to use for the prev/next controls $counterprev = $counter - 1; $counternext = $counter + 1; // Output the "previous" control if ($counterprev > 0) { echo '<a href="#'.$counterprev.'" class="prev">Prev</a>'; } // Output a separator, if needed if ($counterprev > 0 && $counternext <= $photocount) { echo ' / '; } // Output the "next" control if ($counternext <= $photocount) { echo ' <a href="#'.$counternext.'" class="next">Next</a>'; } echo '</p></div>'; // Iterate the counter $counter++; } // Include the jQuery slideshow code (change to match the path on your server, of course) echo '<script type="text/javascript" src="/pathto/flickrslideshow.js"></script>'; echo '</div>'; ?> |
This could be improved in a myriad of ways. For instance, the presentation layer could be abstracted out into ModX chunks and the jQuery could be made to insert the markup which is essentially redundant in the no-script view.
If you notice any errors please post in the comments. As always, I hope that seeing this helps you in your own coding!
Update, May 23 2012: I’m no longer working on a ModX site, so can no longer do much to support this code. It should be considered “as is.”
jQuery Extract Headings for Tab Controls
Hi there. I posted previously about making jQuery tabs, but this week I found myself wanting take that code a bit further. In the old version, the “controls” were written out in a ul above the slides. It got the job done, but wasn’t ideal from a progressive-enhancement point of view (non-JS don’t really have much need for them, so they really shouldn’t be there for those users).
In this version we’re going to include an h3 at the top of each slide and have jQuery pull those out to make the ul controls. The HTML is like so:
<div id="slides"> <div class="slide"> <h3>Slide 1</h3> <p>This is the content of slide one</p> </div> <div class="slide"> <h3>Slide 2</h3> <p>This is the content of slide two</p> </div> </div> |
And the jQuery (the new action is in the first fifteen lines):
$(document).ready(function() { // Insert the wrapper for the controls $('#slides').before('<ul id="slidecontrols"></ul>'); //For each heading... $('#slides div.slide > h3').each(function(){ // Copy it into the controls $(this).clone().appendTo("#slidecontrols"); // and replace the heading markup with list markup, keeping the contained text $('#slidecontrols h3').replaceWith('<li><a href="#">' + $(this).text() + '</a></li>'); }); // Hide those H3s $('.slide > h3').hide(); //Set the initial state: highlight the first button... $('#slidecontrols').find('li:eq(0)').addClass('selected'); //and hide all slides except the first one $('#slides').find('> div:eq(0)').nextAll().hide(); //actions that apply on click of any of the buttons $('#slidecontrols li').click( function(event) { //turn off the link so it doesn't try to jump down the page event.preventDefault(); //un-highlight the buttons $('#slidecontrols li').removeClass(); //hide all the slides $('#slides > div').hide(); //highlight the current button $(this).addClass('selected'); //get the index of the current button... var index = $('#slidecontrols li').index(this); //and use that index to show the corresponding slide $('#slides > div:eq('+index+')').show(); }); }); |
Happy coding!
Creating a jQuery Slideshow of the WordPress Attachments Gallery
Since version 2.5 WordPress has included the ability to upload images and “attach” them to posts and pages. The user can upload a batch of images and the system will create copies at various sizes specified in the site settings. There’s an interface for setting an order and captions. It’s good, and I decided to make use of it for a site I’ve been working on.
The image set is normally included in the post by typing the shortcode in the post body. But in this case I didn’t want my users to have to bother with that — I wanted to call the gallery directly in the theme. And then I wanted to display the images using a simple sliding interface. Unlike my previous slideshow, this one needed to support many instances on a single page.
See an example of the jQuery in action | Download a ZIP of all the files
Insert the Attachment Gallery via the Theme
As helpfully explained in the WordPress codex, it’s very easy to call the gallery from the theme:
<?php echo do_shortcode('[gallery option1="value1"]'); ?> |
But I wasn’t satisfied with the HTML this outputs; I wanted to create my own, which meant adding a function. For this I am indebted to Dameian Lott’s WordPress Image Attachment Gallery (Revisited) post. His method has a lot of useful features and is meant to be really flexible so if you’re going to be doing customization I urge you to head over to his site, grab the full code and read his explanation.
I stripped it down to only the parts I needed. Specifically, I’m outputting the “large” size images, wrapped in certain markup:
Note: This function has been revisited in the post Showing Images from the WordPress Attachments Gallery. Use it instead!
function marty_get_images($size = 'large', $limit = '0', $offset = '0', $post_id = '$post->ID') {
	global $post;

	$images = get_children( array('post_parent' => $post_id, 'post_status' => 'inherit', 'post_type' => 'attachment', 'post_mime_type' => 'image', 'order' => 'ASC', 'orderby' => 'menu_order ID') );

	if ($images) {
		echo '<div class="gallery">';

		$num_of_images = count($images);

		if ($offset > 0) : $start = $offset--; else : $start = 0; endif;
		if ($limit > 0) : $stop = $limit+$start; else : $stop = $num_of_images; endif;

		$i = 0;
		foreach ($images as $attachment_id => $image) {
			if ($start <= $i and $i < $stop) {
			$img_title = $image->post_title;   // title.
			$img_description = $image->post_content; // description.
			$img_caption = $image->post_excerpt; // caption.
			$img_alt = get_post_meta($attachment_id, '_wp_attachment_image_alt', true);

				if ($img_alt == '') {
				$img_alt = $img_title;
				}

				if ($size == 'large') {
				$big_array = image_downsize( $image->ID, $size );
 				$img_url = $big_array[0]; // large.
				} else {
				$img_url = wp_get_attachment_url($image->ID); // url of the full size image.
				}
			?>

			<div class="image"><p><img src="<?php echo $img_url; ?>" alt="<?php echo $img_alt; ?>" title="<?php echo $img_title; ?>" /></p></div>

			<?php if ($img_caption != '') : ?>
			<div class="attachment-caption"><?php echo $img_caption; ?></div>
			<?php endif; ?>
			<?php if ($img_description != '') : ?>
			<div class="attachment-description"><?php echo $img_description; ?></div>
			<?php endif;
			}
			$i++;
		}
	}

		echo '</div><!-- End gallery -->';

} |
And then I call it in my theme like so:
<?php marty_get_images('large','0','0',"$post->ID"); ?> |
The jQuery Slideshow
Before getting into it, I want to say that there are a number of things about this code that are unresolved, and even as I go through writing these notes I’m seeing duplication that ought to be refactored/abstracted out. But I’m posting it here so as to assist others who, like me, are still learning this stuff. Any suggestions you have to improve this code are very welcome!
OK, first the CSS. I like to put as much of the CSS as possible into my stylesheet (as opposed to inserting it on the fly).
.gallerywrapper {width: 700px; overflow: hidden; }
.gallerywrapper .image {width:700px; float: left; }
.gallerywrapper .image p {margin-bottom: 0;}
.gallerywrapper .slidecontrols {clear: both; width: 100%; overflow: hidden; font-size: 11px; margin-top: 0;}
.gallerywrapper .slidecontrols a {color: #ccc; font-weight: bold; font-size: 110%;}
.gallerywrapper .slidecontrols a:hover {text-decoration: none;}
.gallerywrapper .slidecontrols a.active {color: #666;}
.gallerywrapper .slidecontrols a.active:hover {cursor: pointer; text-decoration: underline;} |
As you can see, my slides are set to 700px wide. That’s specific to my case and you will want to change that. The best solution would be to re-write the code so that it’s dynamic to whatever context it’s applied to, and down the road I’ll do that.
On to the jQuery! First off we’ll detect the width of our first slide, as we’ll need this variable for calculations later on.
var slideWidth = $('.image:eq(0)').width(); |
Presenting images in a slideshow requires some elements (such as controls) that aren’t relevant when the images simply follow each other on the page. Because we want our non-JavaScript visitors to be served only the code they need, we left these elements out of the markup we generated above. Here we’ll inject that mark-up which is specific to the slideshow:
// When there's more than one slide, act on the Gallery div $('.image:not(:only-child)').parent().each(function(index) { // Count the number of slides imageLength = $(this).find('.image').length; // Wrap the whole Gallery in a div. $(this).wrap('<div class="gallerywrapper" />'); // Set the Gallery div to the combined width of all the slides $(this).css('width', slideWidth * imageLength); // Inject the controls $(this).parent().append('<p class="slidecontrols"><a title="Previous" class="prev"><span>←</span></a> <a title="Next" class="next"><span>→</span></a> <span class="counter" /></p>'); // Add the slide count to the controls $(this).parent().find('.slidecontrols').append('/' + imageLength); // Determine which instance of the gallery we're working with thisWrapper = $('.gallerywrapper').index($(this).closest('.gallerywrapper')); // Run the Manager method, which is explained below manageGallery(0, thisWrapper); }); // The listener on the controls $('.slidecontrols a').click(function(event) { // Determine which instance of Gallery we're working with thisWrapper = $('.gallerywrapper').index($(this).closest('.gallerywrapper')); // Detect the left-margin of the Gallery... currentMargin = parseInt($(this).closest('.gallerywrapper').find('.gallery').css('marginLeft'), 10); // ... and use it to determine which slide is showing currentPosition = currentMargin / -slideWidth; // Set the target position of the slideshow, determined by which link was clicked nextPosition = ($(this).attr('title')=='Next') ? currentPosition+1 : currentPosition-1; // Run the gallery manager manageGallery(nextPosition, thisWrapper); }); // The listener on the image // This is similar to the above. It would probably be possible/better to combine them into one, reducing duplication. $('.image').click(function(event) { thisWrapper = $('.gallerywrapper').index($(this).closest('.gallerywrapper')); currentMargin = parseInt($(this).closest('.gallerywrapper').find('.gallery').css('marginLeft'), 10); currentPosition = currentMargin / -slideWidth; // Here we're counting the total number of slides... maxPosition = $(this).closest('.gallerywrapper').find('.image').length -1; // ... and setting the slideshow to advance by one unless we're at the end, in which case return to the beginning nextPosition = currentPosition < maxPosition ? currentPosition+1 : 0 ; manageGallery(nextPosition, thisWrapper); }); // And, finally, the Manager method function manageGallery(position, index){ // Here again we're detecting the number of slides maxPosition = $('.gallerywrapper:eq('+index+')').find('.image').length -1; // Create shorthands for the elements we're going to manipulate next = $('.gallerywrapper:eq('+index+')').find('.next'); prev = $('.gallerywrapper:eq('+index+')').find('.prev'); gallery = $('.gallerywrapper:eq('+index+')').find('.gallery'); counter = $('.gallerywrapper:eq('+index+') .slidecontrols .counter'); // This is for displaying the current slide number to the user displayposition = position + 1; // If the target position is within range... if (position <= maxPosition && position >= 0) { // do the slide... $(gallery).animate({ 'marginLeft' : 700 * (-position) } ); // and update the display counter. $(counter).html(displayposition); // If we're at the last slide, grey out the "Next" link position == maxPosition ? $(next).removeClass('active') : $(next).addClass('active'); // And if we're at the first slide, grey out the "Previous" link position == 0 ? $(prev).removeClass('active') : $(prev).addClass('active'); } } |
That’s it! There’s no doubt this could be greatly improved, but I hope seeing it helps you in your project.
Interactive In-Gallery Video Kiosk for Artist Midi Onodera
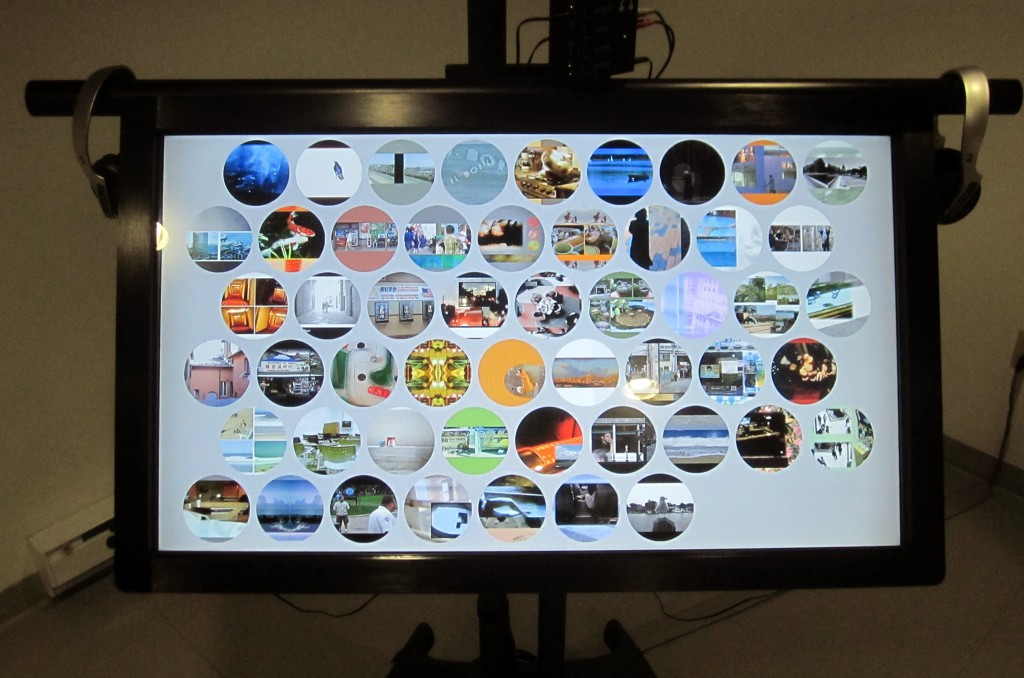
Interactive Touchscreen Interface using jQuery and HTML5 Video
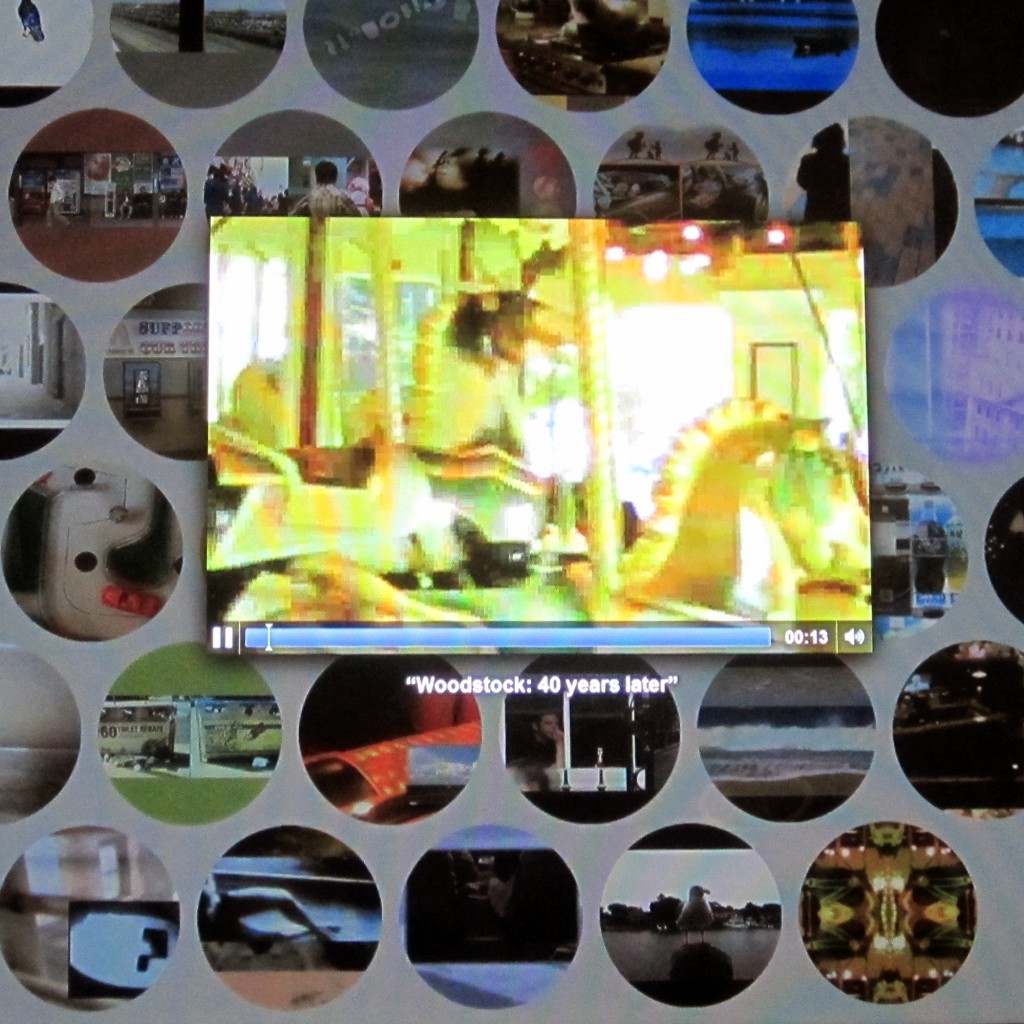
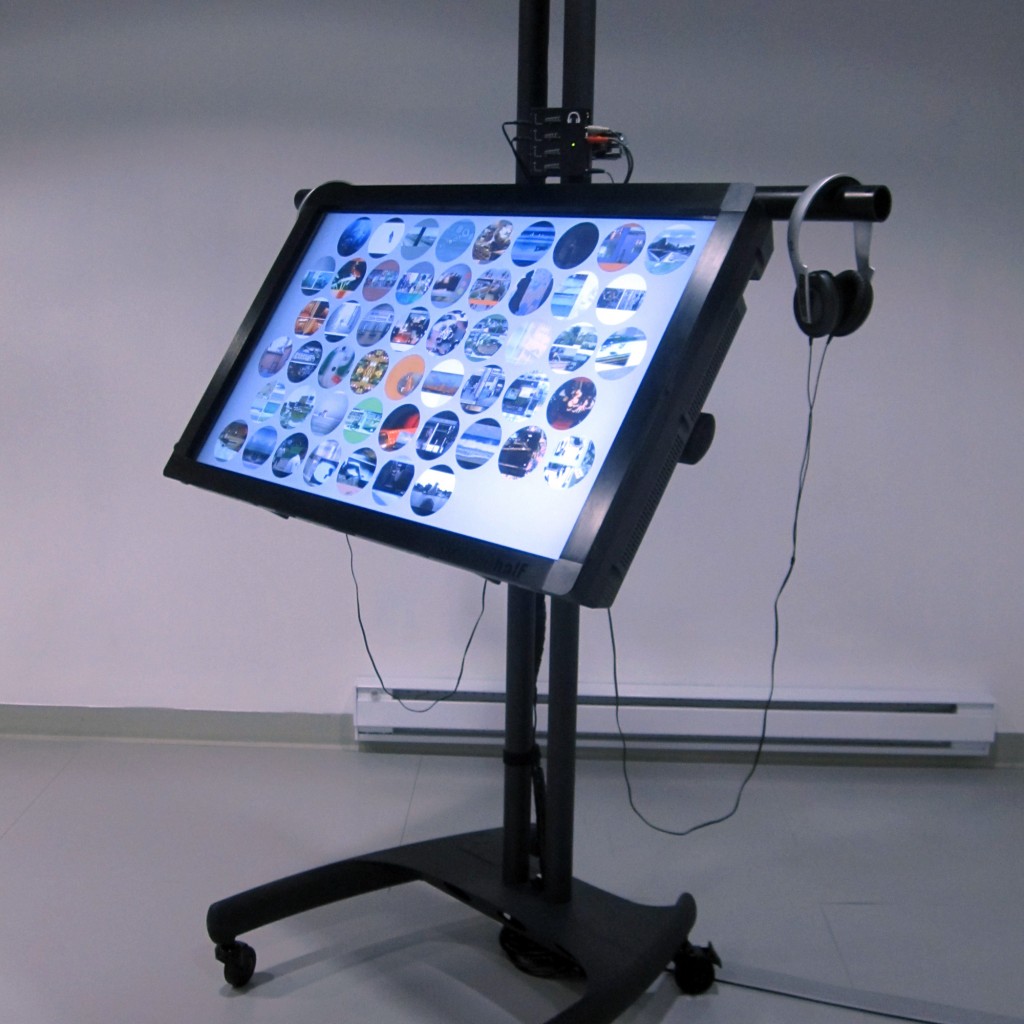
In 2009 artist Midi Onodera created a series of 52 short clips designed for podcasting. I have been fortunate to be involved in this project, providing technical support and new media development. When exhibition opportunities arise, such as Onodera’s recent show at Concordia University in Montreal, we grapple with ways to present these new-media-specific works in the gallery setting. Knowing Concordia had some sweet gear, Onodera chose show this series on a large touch-screen monitor. I designed and implemented the interface using web-standard technologies including jQuery and HTML5 Video.
I have posted the code on Github. It uses a jQuery vertical center function I previously created, as well as some other interface effects. One of my favourite of its features is the randomization: The thumbnails are shuffled as the page is loaded and then each moves to the end of the page upon being selected. At its core are the functions to load and play the clips.
Swapping Sources in an HTML 5 Video
The interface provides access to 53 video clips, but rather than giving each its own instance, I set up an single video element, omitting a source.
<video class="video" id="video" controls="" autoplay="" width="640" height="426"></video> |
And then, when a video is selected, its source is added in and the element begins to play.
$('.video').attr('src','movies/' + movieNum + '.m4v');
document.getElementById('video').play(); |
But the strangest thing happened when the next video is loaded and played: The audio from the first clip would play along with the new! I tried all sorts of things, including completely unloading the video element and creating a new one for each cycle, but still the audio could be heard. What a strange bug!
In the end I found it could be solved by, upon closing the clip, pausing the playback and then removing the video source:
document.getElementById('video').pause();
$('.video').removeAttr('src'); |
All of this can be seen in-context over at Github.
Creating a WordPress Tag Search using jQuery
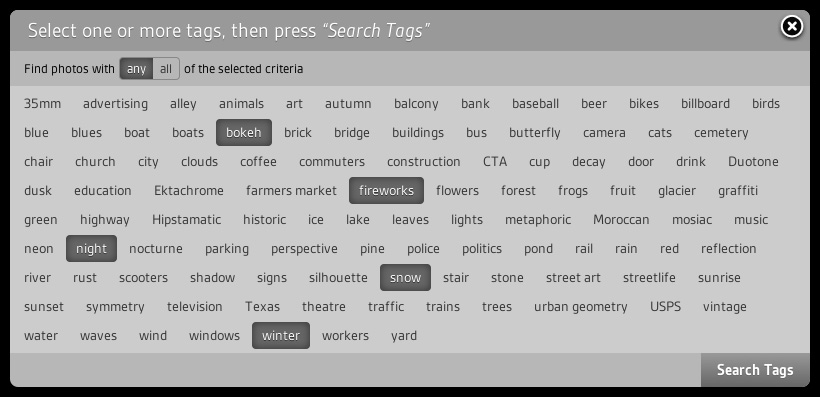
The WordPress taxonomy functions make it easy to give your visitors links to per-tag archives of posts. But is it possible to give them archives of more than one tag? Sure it is!
“Any” & “And” Tag Intersections
By passing parameters via the URL, WordPress will create pages for the intersections of multiple tags. This means we can get posts with any of the tags by separating terms with a comma, like so: /?tag=onetag,anothertag. That is to say a post must have one but need not have all of the tags to qualify.
Conversely, we can get posts with all of the tags by separating terms with a plus, like so: /?tag=onetag+anothertag. This will return only posts that have every tag. There’s various issues with the default output of this, however, so go ahead and install the tTDO Tag Fixes plugin. Running this plugin changes the “all” URL string to /?tdo_tag=onetag+anothertag.
Show All Tags
The first thing we’ll do is print out all the tags, with links, onto the page. This goes in your theme’s functions.php:
function showalltags() { $tags = get_tags(); $html; foreach ($tags as $tag){ $tag_link = get_tag_link($tag->term_id); $html .= "<a href='{$tag_link}' title='{$tag->name} Tag' class='{$tag->slug}'>"; $html .= "{$tag->name}</a>"; } echo $html; } |
And output it somewhere in your theme like so:
<div class="taxonomies"> <h3 id="tags">Tags</h3> <div class="taglist"><?php showalltags(); ?></div> </div> |
Rewrite the markup
Now we’re going to use JavaScript to update the page’s markup to reflect the JavaScript-dependent functionality we’re building. We do this with JS because these controls are only relevant to users with JS-enabled browsers — for others their presence would only be confusing.
Get your jQuery(document).ready(function($) started then include this:
function initialLoad () { $('.taxonomies h3').html('Select one or more tags, then press <em>“Search Tags”</em>'); $('.taglist').before('<div class="searchcontrols"><span>Find photos with </span><a id="any" class="tagtoggle selected">any</a><span class="slash"> / </span><a id="all" class="tagtoggle">all</a><span> of the selected criteria</span></div>'); $('.taxonomies').append('<div><a class="searchtags">Search Tags</a></div>'); } initialLoad(); |
Capture tag clicks
When a user clicks a tag, we’ll override the link and instead add the class “selectedtag”:
$('.taglist a').bind('click', function(event) { event.preventDefault(); if ( $(this).hasClass('selectedtag') ) { $(this).removeClass('selectedtag'); } else { $(this).addClass('selectedtag'); } }); |
Toggle “Any” & “And”
Similarly, capture clicks to the controls:
$('.tagtoggle').bind('click', function(event) { event.preventDefault() $('.tagtoggle').removeClass('selected'); $(this).addClass('selected'); }); |
Construct the URL
This function is the core of the mechanism:
function searchTags() { var optionTexts = []; // For each selected tag... $('.selectedtag').each(function() { // capture the slug from class (stripping out the " selectedtag") var str = $(this).attr('class').replace(/\sselectedtag+/g, ''); // and add it to an array optionTexts.push(str); }); // Set the URL format appropriate to the selected search type if ( $('#any').hasClass('selected') ) { var param = 'tag'; var separator = ','; } else { var param = 'tdo_tag'; var separator = '+'; } // Put the tag list together var tagstring = optionTexts.join(separator); // And send them off to the final, constructed URL window.location = '/?' + param + '=' + tagstring; } |
Enable the Search Button
Last but not least, the action on the search button calls the search function:
$('.searchtags').bind('click', function(event) { event.preventDefault() searchTags(); }); |
And that’s it! You can grab the complete code from Gist.
Updated December 10, 2011 to capture the tag slug from the class, rather than inferring it from the tag name.
Updated May 20, 2012 to reflect a suggestion made by commenter Fris.
Updated May 20, 2013 to reflect a IE7 fix submitted by Betty Jašková.